Sliding Door Roller Adjustment Instructions
Tools Needed
Putty Knife
Phillips Head Screw Driver
Instructions
1. Locate the circular cap that covers the Roller Adjustment Access Hole. It is on the edge of the operating panel just above the Sill Glide Track.
2. Use the putty knife to carefully pry the cap loose. Set it aside.
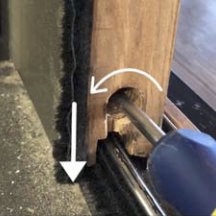
3. Using a Phillips Head Screw Driver, adjust the Roller as follows:
a) Rotate the Screw Driver clockwise to raise the panel.
b) Rotate the Screw Driver counterclockwise to lower the panel.
4. Once adjusted, check the panel by closing the panel approximately 1/4” from the jamb.
5. View the gap to ensure that it is consistent from top to bottom. Make additional adjustments until it is consistent.
6. Once the adjustments are complete, replace the circular cap to cover the access hole.
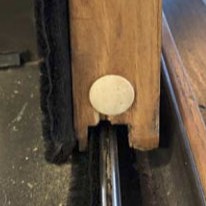
Cap Covering Access Hole
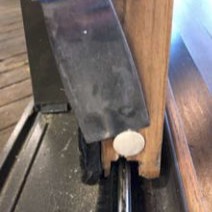
Remove Cap
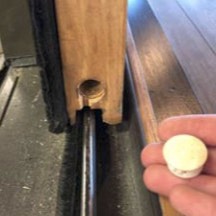
Save Cap
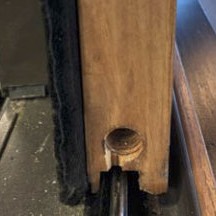
Adjustment Access Hole
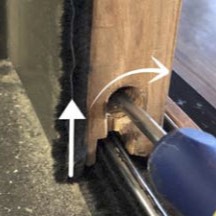
Clockwise To Raise